# Project Basic Settings
# 1.Edit Project Name
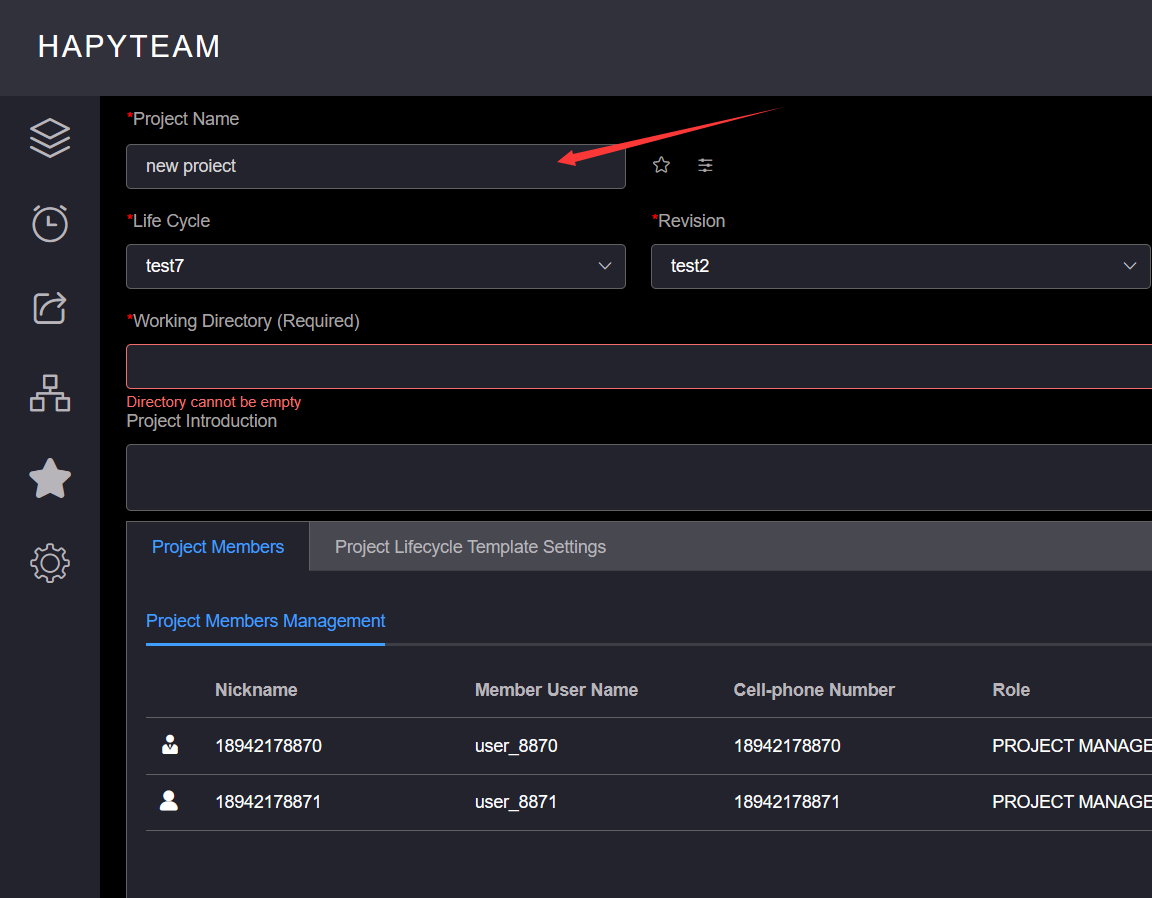
Click the More Operations button at the bottom right of the item card of the item to edit the name, click the Project Settings button to enter the item setting page, click the Project Name, and after editing the item name, Enter wait for the system prompt.
The project name cannot contain /: * ?;<>| Equal characters, and the project name is between 1 and 100 characters in length 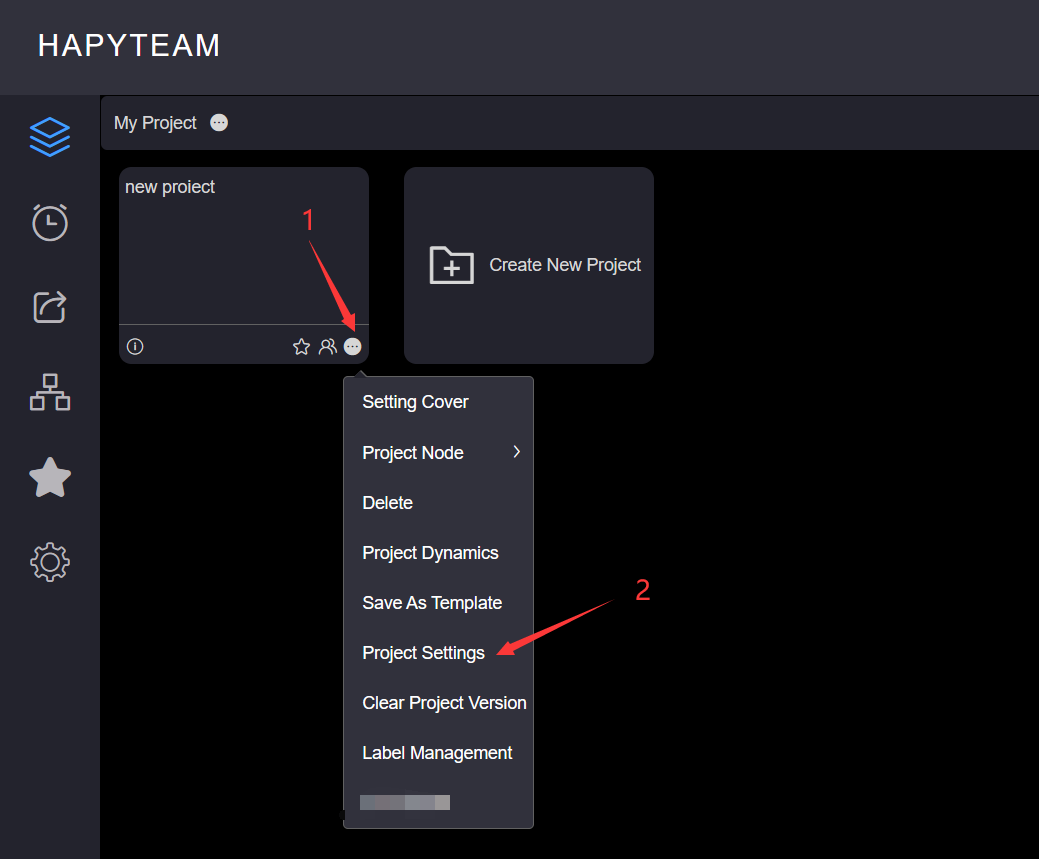
# 2.Favorite items
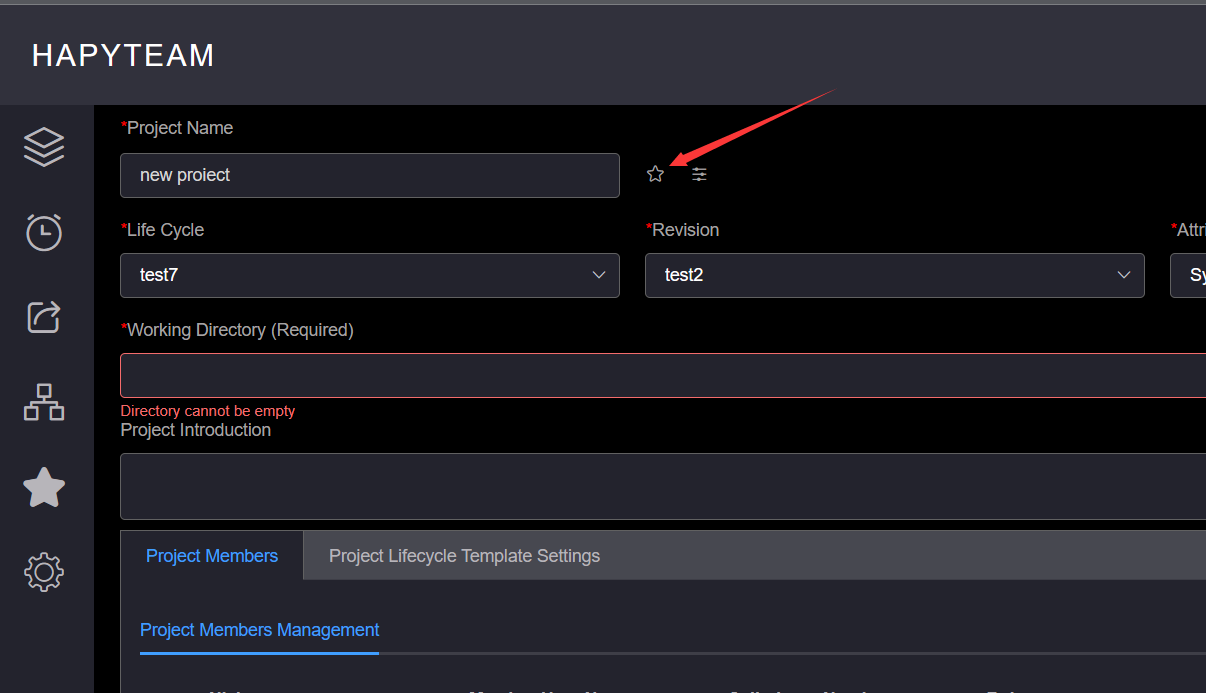
On the item setting page, click the item Collection button behind the item name input box, and wait for the prompt
message. The successfully collected item can be viewed on the collection page.
# 3.Enter the project
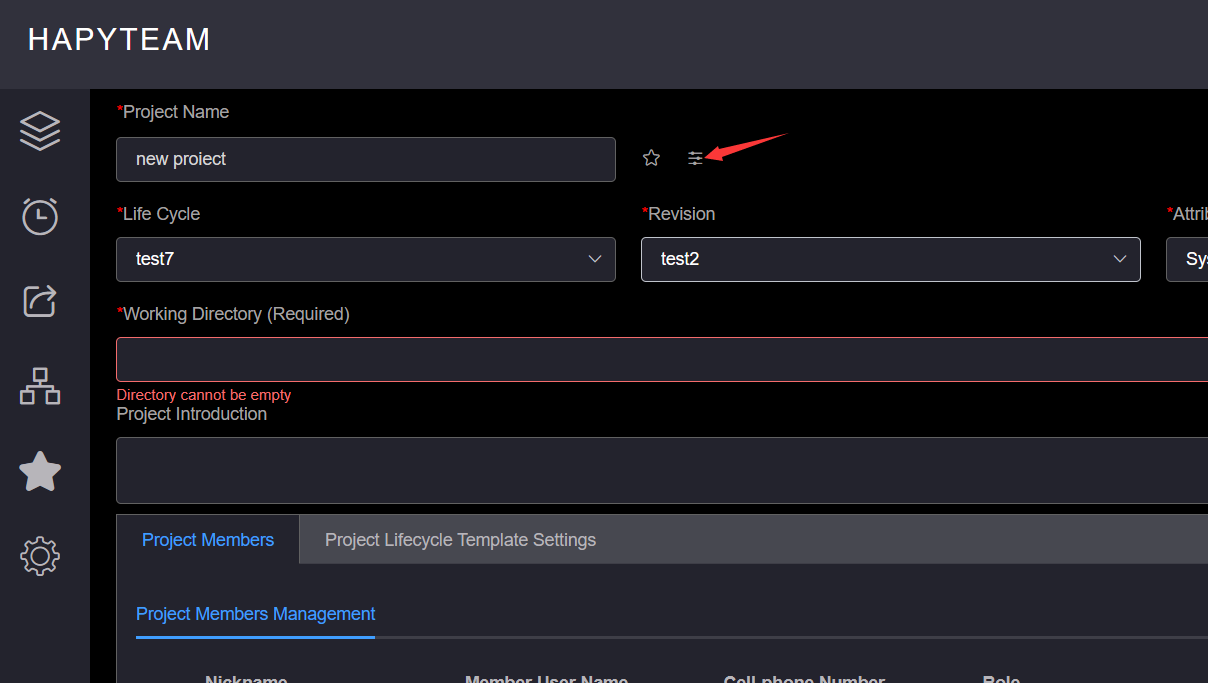
On the project setting page, click the Enter Project button behind the project name input box to jump to the project file management page.
On the project page, clicking on the project card can also enter the project
# 4.Switch lifecycle
On the project setting page, click the lifecycle, and click lifecycle template to switch to open the modify lifecycle preview pop-up window.
If there are no files under the project, when you click Switch Lifecycle Template, the switch will be completed
directly, and the Modify Lifecycle Preview pop-up window will not pop up 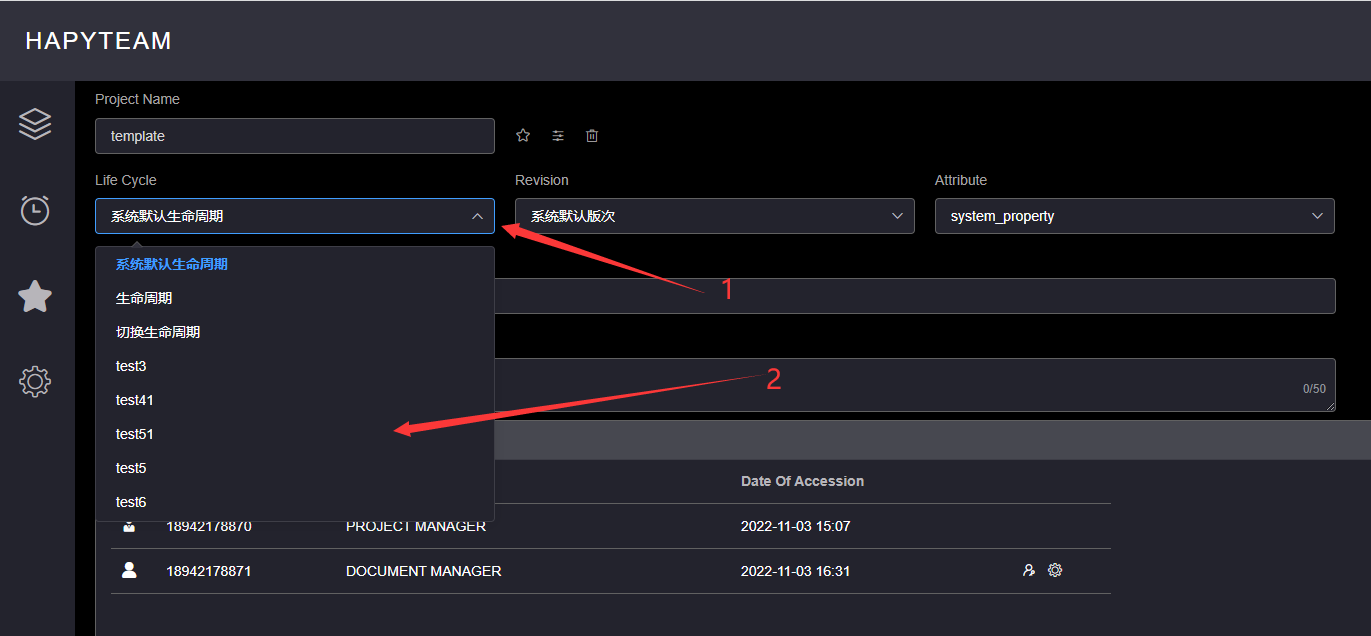
# 5.Switch Versions
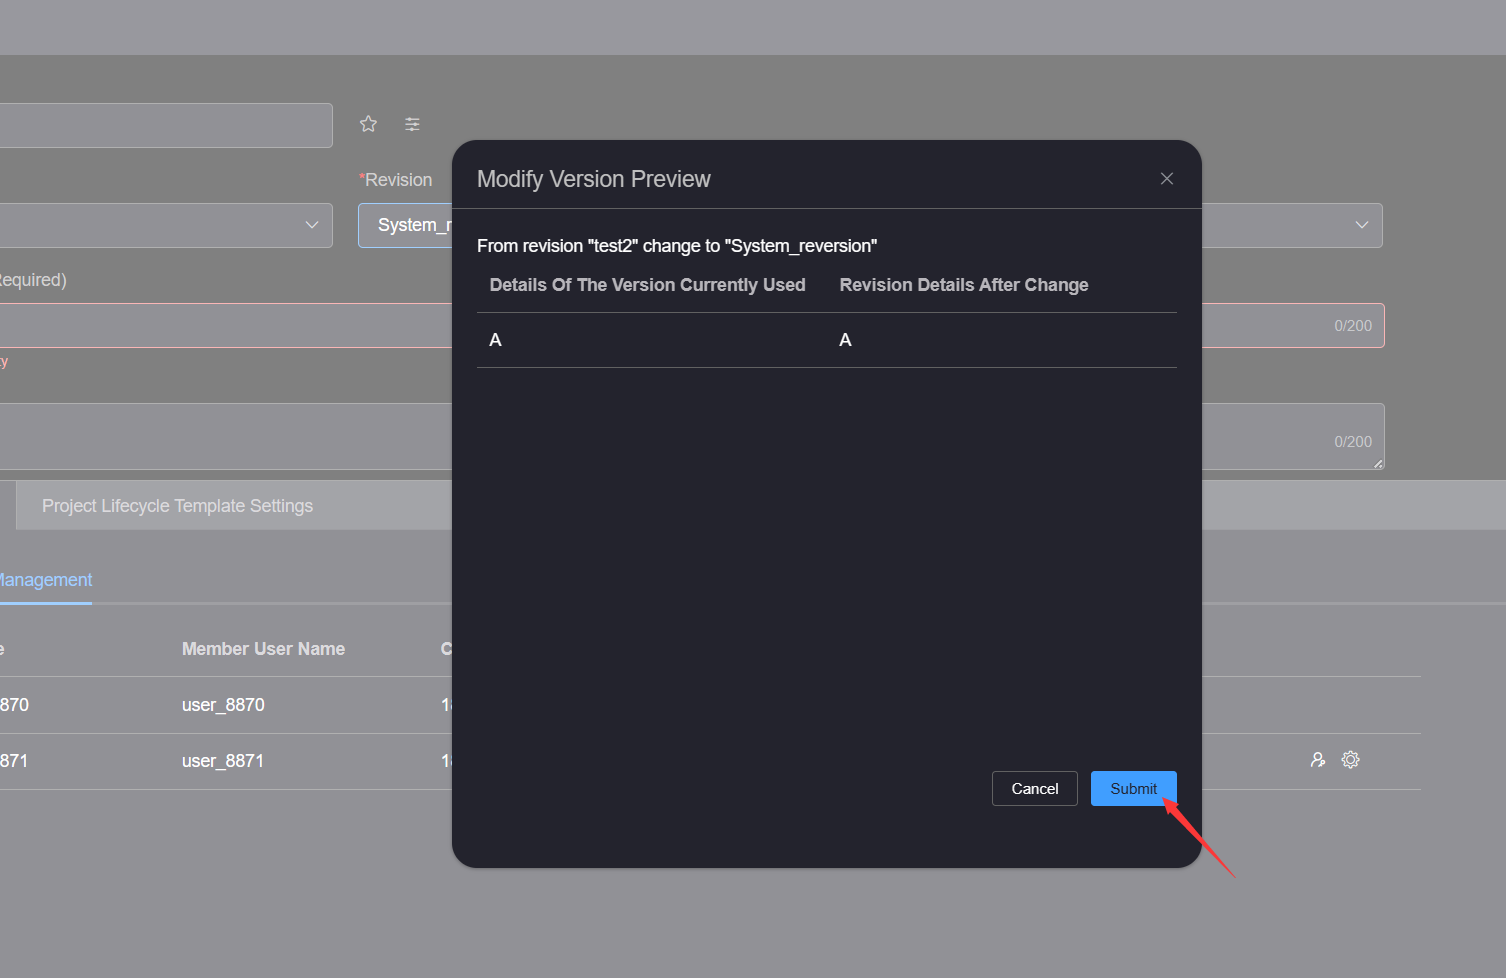
On the project setting page, click the version drop-down box, click the version template to be switched, and a pop-up window of revision preview will pop up, displaying the corresponding relationship between the currently used version node and the version node to be switched.
If there are no files under the project, when you click to switch the version template, the switch will be completed
directly, and the revision preview pop-up window will not pop up 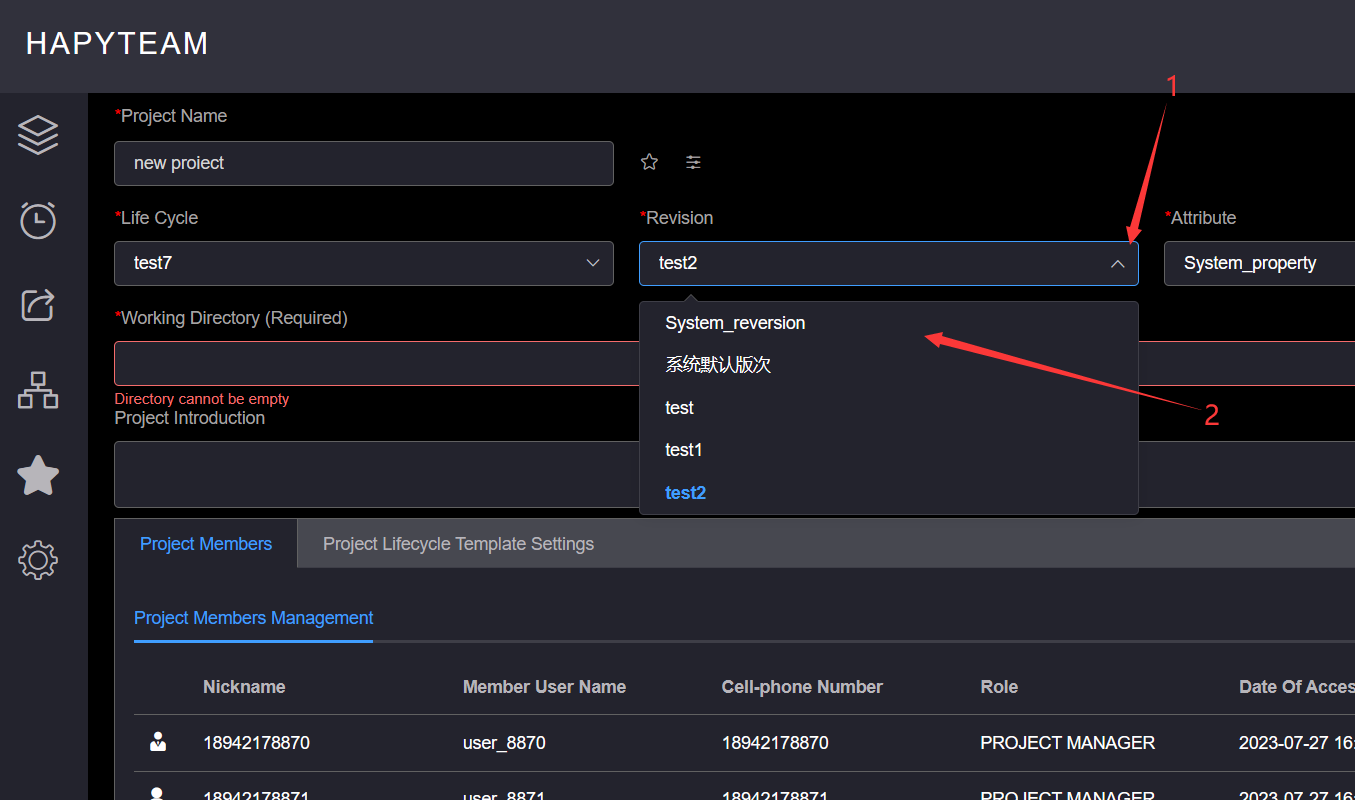
Click the Confirm button in the pop-up window of the revision preview, and wait for the prompt information.
# 6.Switch Attribute
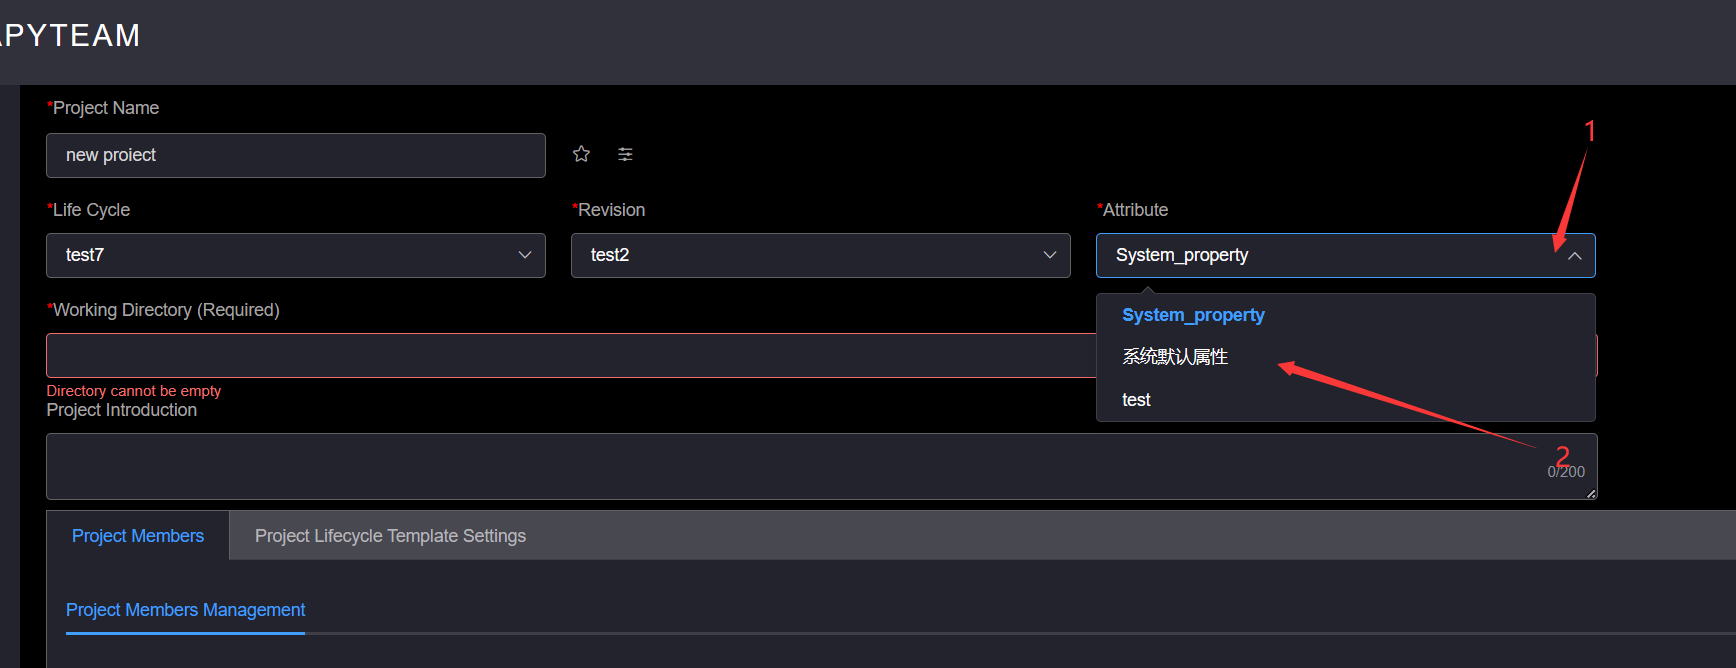
Switch attribute templates On the project settings page, click the attribute drop-down box, click the attribute template
to switch, and wait for the prompt
# 7.Set working directory
On the project setting page, enter the working directory in the working directory input box, press Enter, and wait for
the prompt
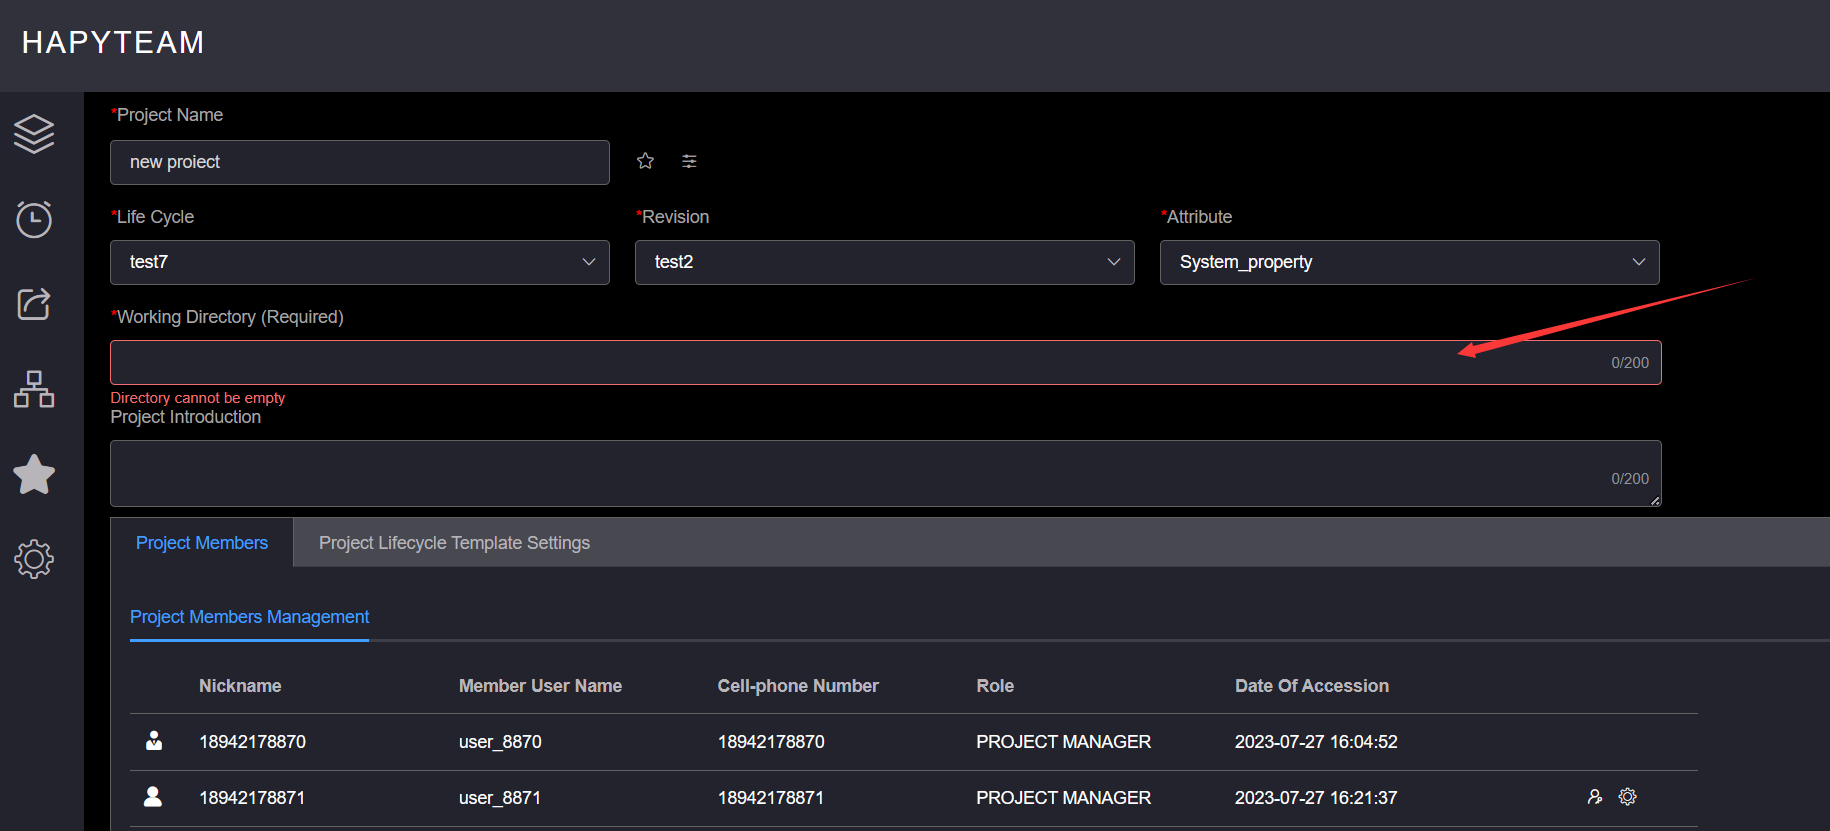
# 8.Set Introduction
On the project setup page, enter the project introduction in the project introduction text box, and press Enter to wait for prompt information
The project introduction is 0~200 characters long 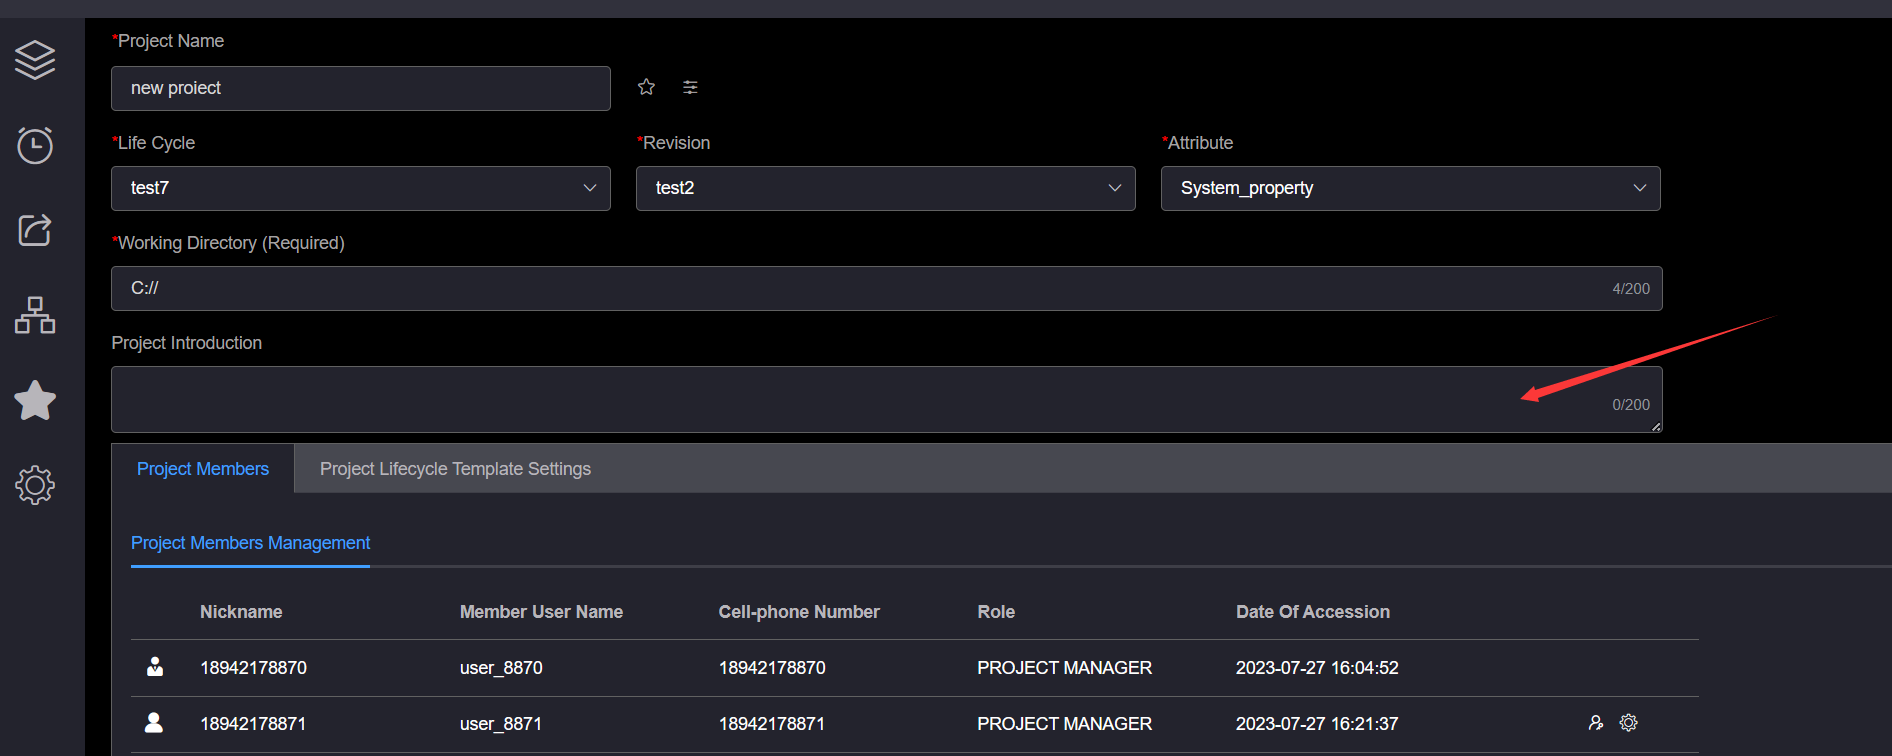
# 9.Set project tags
On the project settings page, enter the tag name in the project tag input box and press enter to view the created project tags
Project tags support batch creation. When entering tags, space connections are used between tags, for example: tag 1 tag 2 tag 3 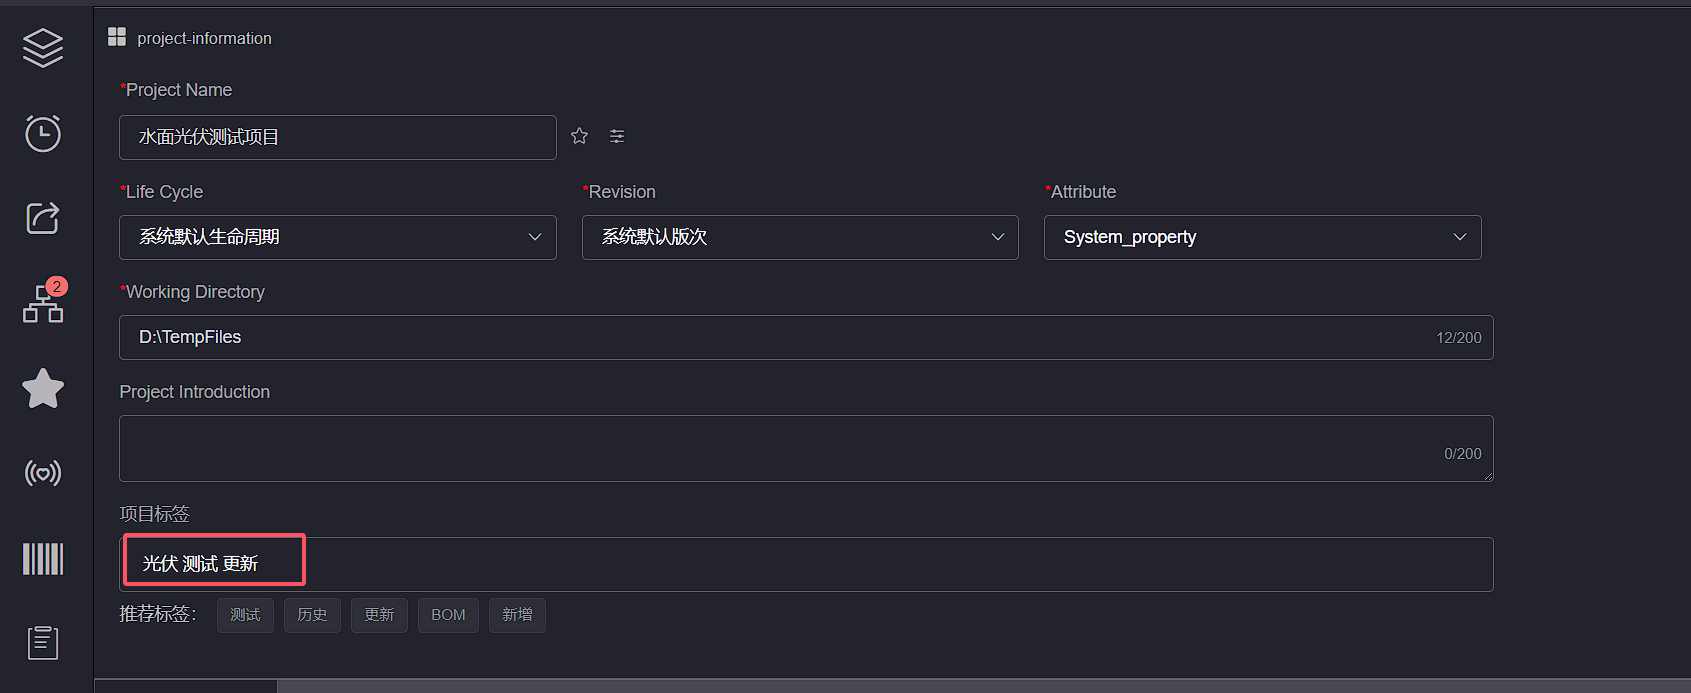
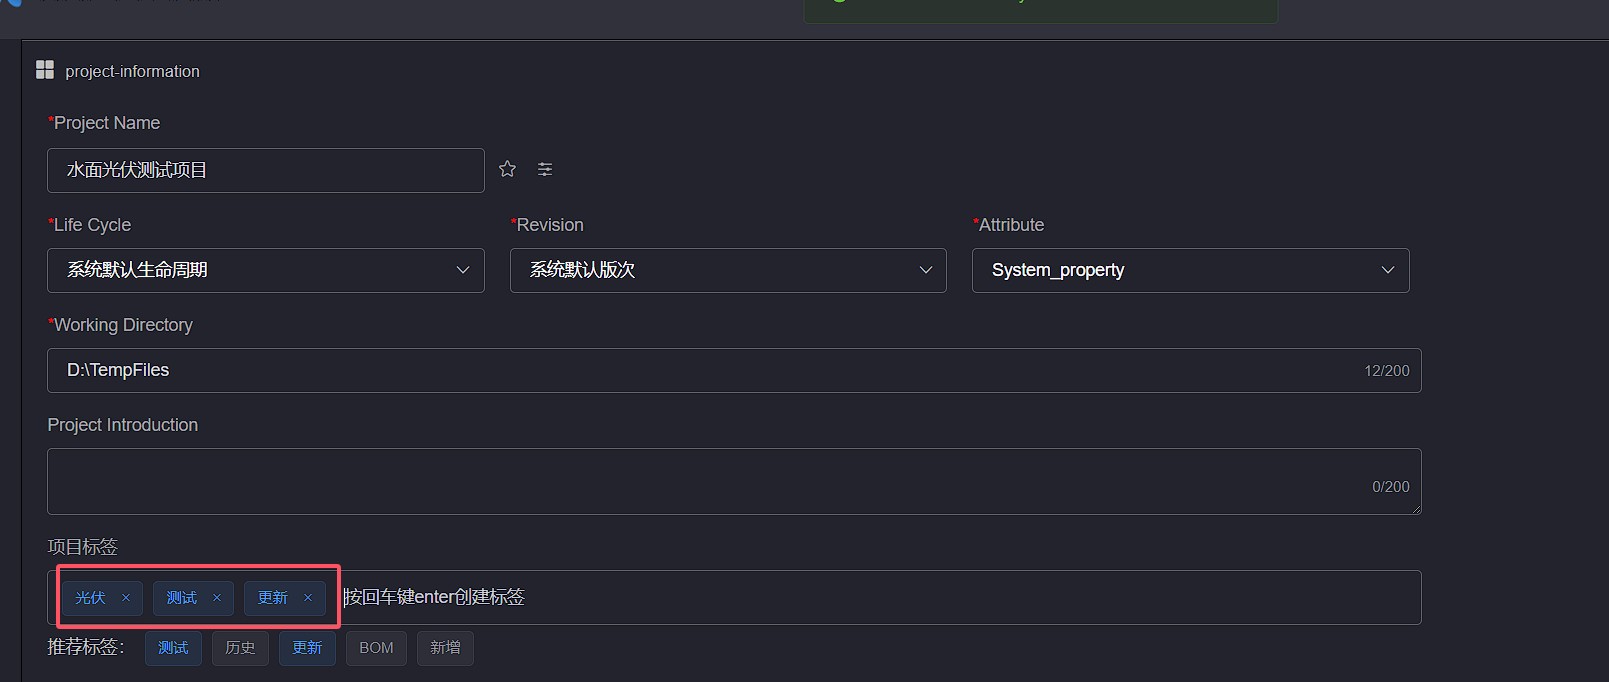
After setting tags for the project, you can use project tags to filter and display project cards in the upper right corner of the project

